9.22.2010

Grab-N-Go List (partial repost)

There have been a lot of fires here in the Western United States lately, including one not too many miles from my home this past week. Thousands of homes have been evacuated with little notice. I've read story after story about families not knowing what to save as they rush to leave their homes in order to be safe.

Today, I'm reposting a portion of a previous post on prioritized evacuation lists because it might be on your mind right now. It's worth a few minutes to make your own list now. It's tough to remember where things are and what you want to take when you're in a panic.

Please make sure to personalize your list. You'll want to locate copies of your list in multiple locations. Hang a list on your fridge and near each door for easy access.


Sample Grab-N-Go List:

Two Minutes:
Kids
Keys
Purse (check for cell phone)
Tennis shoes
Jacket/coat
Car

Five Minutes:
72-Hour Kits (hooks in garage)
Extra food kit (under coats in mud-room)
Bottled water (car trunks)
Both cars (pull out into driveway)
Vital Info Folder (includes birth certificates, insurance policies, etc.)
Cell phone chargers
Dad's medication
Additional cash

Ten Minutes:
[From this point on my list, I've included two columns under each time amount. The first column are survival items, the second column includes possessions that I want to save.]
Additional clothing (fill suitcases/bags with clothing as if packing for a trip)
Blankets (linen closet & beds)
Additional food (pantry)
******
Scrapbooks (office shelves)
Scrapbook bins (office closet)
Journals (office shelves)
Boys' journals (bedrooms)
Camera/video camera (M/D closet)
Family videos (M/D closet & entertainment center)

Twenty Minutes:
Flashlights/lanterns (basement)
Batteries
Tent (under stairs)
Radio (basement)
Camp stove (basement)
Larger water Bottles (basement)
Sleeping bags (under stairs)
********
Mom's portrait (over the piano)
Computer hard drive (pictures are already backed-up online)
Family pictures (on walls - already have digital backups)

One hour or more:
Portable Potty
Food storage
Air mattress
Shovels
Saw
*********
Dad's published books (office shelves)
Musical instruments
Contents of cedar-chest
Quilts


Some things that aren't on my personal list, but that you'll want to consider:
First-aid supplies (I've already included them in both my cars and our 72-hour kits)
Scriptures (also already in our 72-hour kits)
Pets and pet supplies
Medications
Fuel & generators
Eye glasses/contacts
Jewelry


For more information on creating your personal list, see a more complete post here: Prioritized Evacuation List.

9.15.2010

Fruit Leather

It's harvest time and I've got my hands full of extra fruit. Making fruit leather is an easy way to use up any fruit that isn't ideal for eating or canning. Here are my favorite two methods:

1) Hot Car Method
Make your fruit leather on a clear, hot day. It won't work if it's cloudy or too cool (less than 85 degrees). Puree any combination of fruit in your blender. Place parchment paper into a cookie sheet (cookie sheet must have edges). Spray parchment paper with Pam or wipe with vegetable oil. Pour pureed fruit onto parchment paper until it is about 1/8 to 1/4 inch thick. If it is too thin it will break apart too easily. If it is too thick, it won't dry. Park your car out in the sun. Leave your cookie sheets in the car. It might take two days for the fruit to fully dry. Finish drying in a low-temp oven if it hasn't dried after two days.

2) Dehydrator Method:
Puree any variety of fruit in your blender. Spray or wipe fruit roll-up trays with Pam or vegetable oil. Pour fruit into trays until full. Turn on dehydrator to recommended temperature. It takes about 24 hours until they are dry. Don't bother to roll and wrap with plastic wrap if your house is like mine. I made my first batch two days ago and it's already gone.

These trays have (clockwise from the top) peaches mixed with applesauce, only peaches, and strawberries mixed with applesauce. I add 1 T. of lemon juice per blender-full of puree to help slow browning. Applesauce is a great extender. I buy it in #10 cans at Costco for about $4.

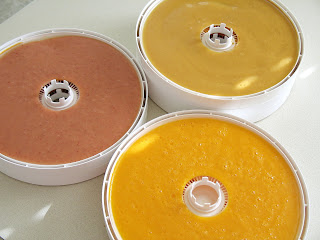
I dried this batch too long and it crackled apart. It still tastes good, but is harder to roll onto plastic wrap.


For more information: Dehydrating Foods At Home

9.09.2010

Fall Reminders


My kids have already headed back to school. My home is much more quiet and clean. You might find yourself with more time to address preparedness. Here are several suggestions for renewed efforts:


1) Keep working on your three-month supply.

You can use the iPrepared worksheet for a one-week supply or some other source. Resolve to at least make a menu this fall. It's so easy to drop a one-week supply menu into your purse or pocket to keep on hand for grocery trips.


2) Look for fall sales.

Here in Utah, the case lot sales are starting. Fellow preparedness blogger, Prepared LDS Family, has a fantastic comparison price sheet to help find the good buys. (I don't think that the Maceys sales have been added to her link yet.) Shopping sales is a great way to save a little money that you can then put towards your three-month supply.


3) Review backpack emergency kits.

My kids all have new bags, which means that their old pocket-sized emergency kits are either still in their old bags or have been thrown away. Back to school is a great time to refresh those supplies and make sure that your kids have a few necessities on hand.


4) Learn a new food preservation skill.

A lot of local produce is cheap right now as it is being harvested. It's also time to start picking fruit and vegetables from your own trees and gardens. A great self-reliance skill is to be able to provide and preserve your own fruits and vegetables year round. Local extension services often offer classes on food preservation techniques. Don't be overwhelmed by pressure cookers and canners. You can start by learning dehydrating and cold-storage techniques that can extend your harvest and don't even require special equipment, just a little knowledge.


9.04.2010

Lessons from New Zealand

After yesterday's 7.0 earthquake in New Zealand, power has been restored to the majority of homes. However, many of the residents are still without water. Many water and sewer lines were severed in the earthquake. Because of the sewage contamination, many backup drinking-water sources have also been compromised.

The New Zealand Herald is reporting that "There is a shortage of drinkable water in Waimakariri, mostly Kaiapoi. The Selwyn District has nearly returned to normal in urban centres but rural areas remain problematic. Rolleston's water is contaminated. Residents of Canterbury still advised to boil water prior to use, also to avoid recreational use of water as rivers have been affected with sewage."

We've seen this same scenario over and over in varied situations. Once the dust settles, the primary concern is water. Water sources are often compromised at best and non-existent at worst. Water supplies are already on their way to Christchurch, but obviously it is going to take some time to distribute it to those who need it.

So, what do I want you to do with this information? Store Water! You don't have to have special equipment - just a clean, empty soda bottle. Swish with 1 teaspoon of bleach mixed with about a quart of water, rinse well and fill with chlorinated water. Start now. In my opinion, it's the most important part of your home storage.

Past posts on water:
Two Weeks
Haiti
Prepared in Houston
Would I Have Been Ready?


Sources:The New Zealand Herald - Latest News Christchurch Earthquake
The New Zealand Herald - City Awakes to Billion-Dollar Aftershock
Safe Drinking Water (includes instructions for non-chlorinated water)